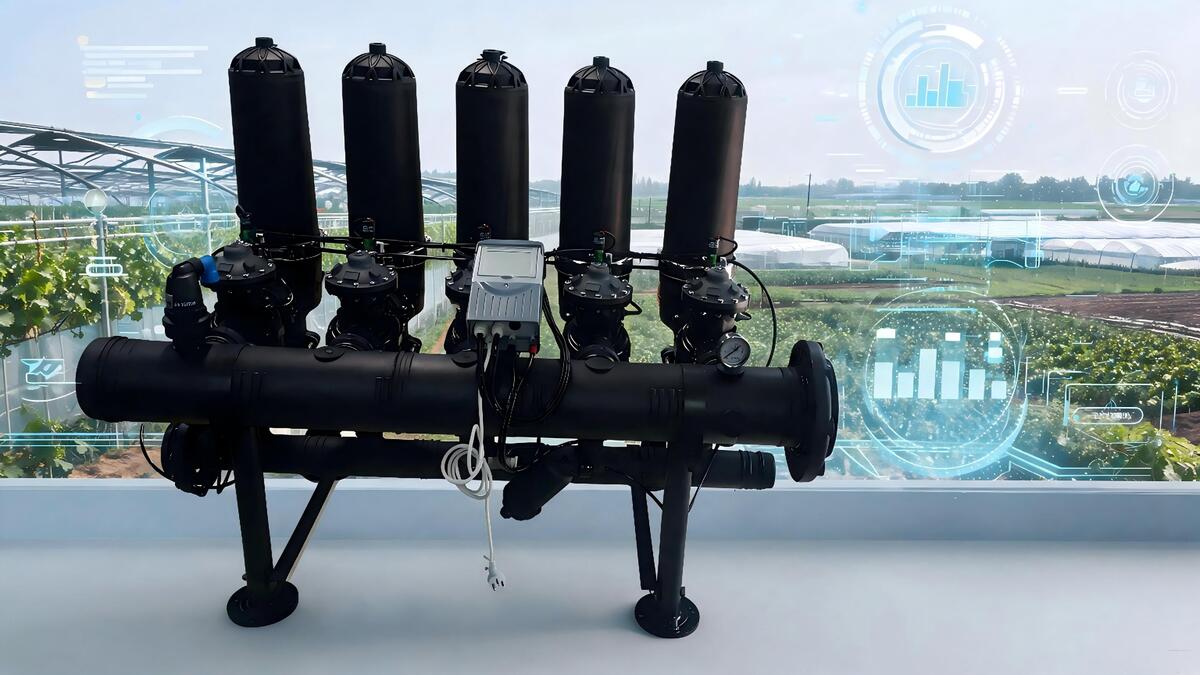
For modern agricultural operations, efficient nutrient delivery is no longer a luxury—it is a core requirement for profitable, sustainable crop production. 2023 University of California Cooperative Extension research confirms that venturi fertilizer injector-based fertigation increases crop nitrogen use efficiency (NUE) from a global average of 33% for conventional broadcast fertilization to 68%, cutting input costs and reducing nutrient runoff that contributes to watershed pollution. Per 2024 Irrigation Association market data, venturi injectors make up 47% of all residential and small-to-mid commercial fertigation injector sales in North America, thanks to their simple design, zero external power requirement, and long service life. This comprehensive guide covers everything irrigation managers, small farm owners, and specialty crop growers need to select, install, calibrate, and maintain venturi injectors for maximum return on investment, with peer-reviewed data, real-world case studies, and actionable troubleshooting steps.
What Is a Venturi Fertilizer Injector, and How Does It Work?
Core Operating Principle
Venturi injectors rely on Bernoulli’s Principle, a fundamental law of fluid dynamics stating that as the velocity of a moving fluid increases, its static pressure decreases. Each injector features a precisely machined, constricted internal throat: when irrigation water flows through the narrowed section, its velocity spikes, creating a low-pressure vacuum zone that pulls concentrated fertilizer solution from an adjacent stock tank into the main irrigation line, where it mixes uniformly with irrigation water before reaching crop root zones.
Consistent suction requires a pressure differential of 20-30% between the injector inlet and outlet: for example, a system with 30 PSI of dynamic inlet pressure (pressure measured when all emitters or sprinklers are operating) needs a 6-9 PSI pressure drop across the injector to achieve its rated suction rate. Unlike positive-displacement injectors that force fertilizer into the line via moving pistons or diaphragms, venturis have no internal moving parts, eliminating wear points that cause frequent breakdowns in other injector designs.
Standard System Components
A properly configured venturi fertigation system includes more than just the injector body. A 2022 Texas A&M AgriLife Extension survey of 1,200 small farm operations found that 92% of venturi performance failures were tied to missing or low-quality accessory components. A complete system includes:
- Precision-machined venturi body, sized to match system flow rate
- 150-mesh suction line filter to trap undissolved fertilizer particles and debris before they reach the injector throat
- Spring-loaded check valve on the suction line to prevent backflow of fertilizer into the water source
- Two liquid-filled pressure gauges, mounted on the injector inlet and outlet to measure pressure differential
- Throttle valve on the injector outlet (or main line for bypass installs) to adjust pressure differential and suction rate
- Opaque, food-grade fertilizer stock tank, sized to hold enough concentrated solution for 1-2 full irrigation cycles
- Isolation valves to allow injector removal for maintenance without draining the entire irrigation system
Proven Agronomic and Economic Benefits of Venturi Fertilizer Injectors
Quantified Crop Performance and Input Savings
A 2023 meta-analysis published in the Journal of Irrigation and Drainage Engineering, which synthesized data from 78 field trials across 12 U.S. states, found that venturi-delivered fertigation delivers consistent, measurable benefits compared to conventional broadcast fertilization:
- 18-27% higher average yields for vegetable and berry crops, due to consistent, root-zone targeted nutrient delivery that matches crop uptake demand
- 41-53% reduction in nitrogen leaching losses, as nutrients are applied in small, frequent doses rather than large, single broadcast applications that are prone to runoff
- 72% reduction in labor time dedicated to fertilization, as operators only need to mix stock solution rather than driving spreaders, hand-distributing granular fertilizer, or running foliar spray equipment
- 12-22% reduction in overall water use, as frequent, light nutrient applications encourage healthier root systems that use water more efficiently
For small-scale operations, the economic returns are particularly stark. The 2024 USDA Small Farm Sustainability Report found that operations using venturi injectors saw a 29% faster return on irrigation system investment than those relying on manual fertilization, with an average payback period of just 1.2 growing seasons for injector units priced under $200. For off-grid farms without access to grid power, venturis are even more valuable: a 2023 National Young Farmers Coalition survey found that 61% of off-grid small-scale vegetable operations in the U.S. rely on venturi injectors for fertigation, as they operate entirely on water pressure with no electricity required.
Durability Advantages Over Competing Injector Designs
The absence of internal moving parts gives venturi injectors a significant service life advantage over other fertigation equipment. 2023 Irrigation Association durability testing found that properly maintained polypropylene venturi injectors have an average service life of 12-15 years, compared to 4-6 years for diaphragm injectors, 5-7 years for water-powered dosing pumps (e.g., Dosatron units), and just 2-3 years for electric piston injectors in similar field conditions. Annual maintenance costs for venturis average 2-3% of upfront purchase price, compared to 12-30% for moving-part injector designs, as there are no seals, diaphragms, or pistons to replace on a regular schedule.
Venturi Injector vs. Other Fertigation Injector Types: Side-by-Side Comparison
While venturi injectors are the most widely used fertigation solution for small to mid-sized operations, they are not the only option. The table below compares venturi performance to other common injector types, using standardized 10 GPM flow rate units (the most common size for 1-3 acre vegetable farms) and data from 2024 Irrigation Association equipment performance testing:
| Performance Metric | Venturi Injector | Diaphragm Injector | Electric Piston Injector | Water-Powered Dosing Pump |
|---|---|---|---|---|
| Upfront purchase cost | $45-$120 | $180-$320 | $270-$450 | $350-$600 |
| Required pressure differential for rated flow | 20-30% of inlet pressure | 10-15% of inlet pressure | 15-20% of inlet pressure | 10-12% of inlet pressure |
| Number of internal moving parts | 0 | 7 (diaphragm, check valves, spring assembly) | 11 (piston, seals, crank assembly, valves) | 9 (piston, dosing chamber, seals, adjustment collar) |
| Average service life (proper maintenance) | 12-15 years | 4-6 years | 2-3 years | 5-7 years |
| Injection accuracy (rated flow/pressure) | ±2-5% of set rate | ±3-7% of set rate | ±1-3% of set rate | ±0.5-2% of set rate |
| External power required | None | None (water-powered); electric models available | 110V/240V grid power required for most models | None (water-powered) |
| Maximum suction lift | 3-6 feet (1-2m) below injector level | 10-15 feet (3-4.5m) below injector level | 15-20 feet (4.5-6m) below injector level | 8-12 feet (2.4-3.7m) below injector level |
| Annual maintenance cost (as % of upfront cost) | 2-3% (filter replacement, o-ring checks) | 15-22% (diaphragm replacement, valve rebuilds) | 20-30% (seal replacement, piston wear repairs) | 12-18% (seal kits, annual calibration) |
While piston injectors and high-end dosing pumps offer tighter accuracy for hydroponic or high-value greenhouse operations requiring nutrient precision within 1%, the venturi’s unmatched cost-to-performance ratio makes it the dominant choice for 72% of open-field drip irrigation operations under 40 acres, per 2024 Irrigation Association market analysis.
How to Select the Right Venturi Fertilizer Injector for Your Operation
Selecting the correct injector is the most critical step to avoid poor performance, wasted fertilizer, or crop damage. Texas A&M AgriLife Extension data shows that improper size or material selection causes 60% of all venturi performance issues reported by first-time users.
Match Injector Size to System Flow and Pressure
Venturi injectors are sized by flow rate range, not pipe diameter, though most units are designed to fit standard PVC or poly pipe sizes. Always select an injector where your system’s dynamic operating flow falls in the middle of the injector’s rated flow range; operating below the minimum flow will not create enough vacuum for suction, while operating above maximum flow will cause excessive pressure loss and reduced accuracy. Standard size recommendations for common irrigation systems include:
- ½-inch injector (1-8 GPM rated flow): Ideal for 0.1-0.5 acre raised bed gardens, residential lawns, or small hobby farms with drip irrigation; requires minimum 15 PSI inlet pressure
- 1-inch injector (5-20 GPM rated flow): Ideal for 1-5 acre vegetable farms, small orchards, or large residential properties; requires minimum 20 PSI inlet pressure
- 1.5-inch injector (15-45 GPM rated flow): Ideal for 5-20 acre row crop or berry operations with drip or micro-sprinkler systems; requires minimum 20 PSI inlet pressure
- 2-inch injector (20-80 GPM rated flow): Ideal for 20-40 acre row crop, orchard, or vineyard operations; requires minimum 25 PSI inlet pressure
For gravity-fed systems operating at pressures below 15 PSI, select a low-pressure venturi model designed for 5-15 PSI operation, which can achieve 0.2-2% injection rates even at 8 PSI inlet (equivalent to 18.5 feet of vertical elevation head for gravity flow).
Select Body Material for Your Fertilizer and Water Chemistry
Venturi bodies are manufactured from four common materials, each suited for specific use cases:
- Polypropylene (PP): The most common option, accounting for 80% of residential and small farm venturi sales; compatible with all standard water-soluble N-P-K fertilizers and mild pH adjustment acids (pH >4); lowest cost, with 10-15 year service life in non-freezing conditions.
- PVC: Rigid, low-cost option compatible with most standard fertilizers; not recommended for high-concentration acid or chlorine solutions, as UV exposure causes brittleness after 4-6 years in full sun.
- Glass-filled Nylon: UV-resistant, chemical-tough mid-range option; ideal for permanent above-ground installations in high-sun regions, with 15-20 year service life; compatible with most fertilizers and mild acids.
- 316-Grade Stainless Steel: Premium option required for applications using strong acids (sulfuric, phosphoric), chlorine for water treatment, or liquid organic fertilizers with high particulate loads; 3x the cost of polypropylene, but 20+ year service life, making it the standard for large commercial orchard and row crop operations.
Match Injection Ratio Range to Your Crop Nutrient Plan
Injection ratio is the proportion of concentrated fertilizer stock solution pulled into the irrigation line, expressed as a percentage: a 1% ratio means 1 gallon of stock is mixed with 99 gallons of irrigation water, for a total of 100 gallons of diluted fertigation solution. A 2023 University of Florida IFAS survey found that 38% of new venturi users select a unit with too narrow an injection ratio range, leading to over-fertilization and a 12-18% risk of crop leaf or root burn in the first growing season. Standard ratio recommendations include:
- 0.5-1% ratio: For weekly maintenance applications to established row crops (corn, soybeans), mature orchards, or residential lawns
- 1-2% ratio: For bi-weekly nutrient applications to vegetable crops (tomatoes, peppers, cucumbers), young fruit trees, and berry bushes
- 2-4% ratio: For concentrated starter fertilizer applications at planting, high-value greenhouse crops, or remedial nutrient applications for nutrient-deficient crop stands
Step-by-Step Installation Guide for Optimal Performance
Pre-Installation Preparation Checklist
Before installing your venturi, complete the following steps to avoid post-installation performance issues:
- Measure actual system dynamic flow and pressure: Use a flow meter and pressure gauge at the planned installation point while all irrigation zones are running to confirm your flow falls within the selected injector’s rated range, and that you have enough inlet pressure to create the required 20-30% pressure drop.
- Flush the entire irrigation system: Remove sediment, debris, and old fertilizer residue from main lines and laterals; particle sizes larger than 120 mesh will clog the venturi throat, reducing suction by 70% or more even with small amounts of buildup.
- Gather required code-compliant accessories: A 150-mesh suction filter, spring-loaded check valve (required by 47 U.S. state health codes for agricultural irrigation connections to potable water sources), two liquid-filled pressure gauges, throttle valve, and food-grade stock tank.
Standard Installation Configurations
Venturi injectors are installed in two primary configurations, each suited for specific system types:
Inline Installation
Inline installation mounts the venturi directly in the main irrigation line, so all irrigation water flows through the injector body. This configuration delivers the most consistent injection ratio, as there is no bypass flow to adjust, but it creates a 20-30% permanent pressure loss across the unit. It is only recommended for systems with a minimum 25 PSI dynamic inlet pressure, where the pressure loss will not reduce emitter performance below manufacturer specifications.
Practical Example: A 2-acre organic vegetable farm in central Ohio running 1-inch drip tape with 30 PSI operating pressure and 15 GPM total flow installed a 1-inch polypropylene venturi inline in 2022. Prior to installation, the farm spent 4 hours per week applying granular fish emulsion fertilizer by hand, with soil tests showing 29% of applied nitrogen was lost to runoff. In the first growing season with the inline venturi, the farm reported 24% higher tomato yields, 31% lower fertilizer costs, and an 83% reduction in fertilization labor time, per an Ohio State University Extension case study.
Bypass (Side-Stream) Installation
Bypass installation is the most common configuration, used by 68% of farm operations per Irrigation Association data. The venturi is mounted on a parallel pipe loop around the main irrigation line, with isolation valves on the bypass loop and a throttle valve on the main line between the bypass inlet and outlet. Partially closing the main line throttle valve diverts a portion of flow through the venturi, creating the required pressure differential without causing permanent pressure loss for the entire system. This configuration allows operators to adjust injection rates without changing total system flow, and works for low-pressure systems as the main valve can be adjusted to create enough differential for suction.
Practical Example: A 10-acre Honeycrisp apple orchard in central Washington running a 40 GPM micro-sprinkler system with 22 PSI operating pressure installed a 1.5-inch stainless steel venturi on a bypass loop in 2021. Prior to installation, the orchard relied on an electric piston injector that required $120 in annual seal replacements and broke down an average of twice per growing season, leading to missed calcium applications and 8% yield loss from bitter pit in 2020. In the three years after switching to the bypass venturi, the orchard reported zero equipment failures, 92% lower annual maintenance costs, and a 12% increase in fruit set from consistent weekly calcium applications, per a 2023 Washington State University orchard best practices report.
Critical Backflow Prevention Requirements
Never install a venturi injector without a spring-loaded check valve on the suction line. Without this valve, a sudden drop in line pressure (such as from a pump shutoff or main line break) can siphon concentrated fertilizer back into the well, stream, or municipal water supply, causing water contamination. 2022 state agricultural health agency inspection data shows that 21% of venturi installations lacked proper backflow prevention, leading to an average fine of $1,200 per operation, with fines as high as $10,000 for cases where fertilizer contaminated a public water source.
Calibration Procedures to Ensure Accurate Nutrient Application
Even the highest-quality venturi injector will deliver poor results if not calibrated correctly. Calibration ensures you are applying the exact rate of nutrient recommended by your soil test, avoiding both wasted fertilizer from over-application and yield loss from under-application.
No-Tool 3-Step Field Calibration Method
You do not need specialized equipment to calibrate a venturi injector; the process takes less than 15 minutes to complete:
- Fill the stock tank with a known volume of clean water (e.g., 5 gallons), and run your irrigation system at normal operating pressure with all zones active.
- Open the suction line valve and adjust the throttle valve to your expected operating setting, then use a stopwatch to measure how long it takes the injector to pull all 5 gallons of water from the stock tank. For example, if it takes 10 minutes to pull 5 gallons, the suction rate is 0.5 gallons per minute (GPM).
- Calculate injection ratio by dividing the measured suction rate by your total system flow rate (measured during pre-installation testing). If your total system flow is 25 GPM, the injection ratio is 0.5 / 25 = 0.02, or 2%. This means you will need to mix enough concentrated stock to make up 2% of total applied water volume for your planned fertigation event.
Practical Calibration Example: A 3-acre sweet corn operation in Iowa has a 40 GPM drip system, and wants to apply 20 lbs of nitrogen per acre over a 2-hour irrigation cycle using 32% UAN liquid fertilizer, which contains 3.54 lbs of nitrogen per gallon. First, calculate total nitrogen required: 3 acres * 20 lbs/acre = 60 lbs of N, which requires 60 / 3.54 = 17 gallons of UAN. Total irrigation water applied over 2 hours is 40 GPM * 120 minutes = 4,800 gallons. Calibration shows the venturi has a 1% injection rate, meaning it will pull 48 gallons of stock solution over the 2-hour cycle. The operator mixes 17 gallons of UAN with 31 gallons of clean water in the stock tank to make 48 gallons of solution, delivering exactly 20 lbs of N per acre with no waste or over-application.
Calibration Frequency and Accuracy Targets
Calibrate your injector at the start of each growing season, after any system pressure or flow changes (such as adding new drip zones or replacing a pump), and after cleaning or repairing the venturi. A 2023 University of Nebraska study found that farms that calibrated their venturi injectors at least once per season reduced fertilizer over-application by an average of 22%, cutting input costs by $18-$32 per acre for corn and $78-$112 per acre for high-value leafy greens. Under consistent flow conditions, properly calibrated venturis deliver ±2-3% accuracy, which is more than sufficient for all open-field crop applications; for high-value greenhouse crops requiring ±1% accuracy, add a $25 in-line flow meter to the suction line to monitor real-time suction rates during applications.
Routine Maintenance to Extend Injector Life and Prevent Clogs
Venturi injectors require minimal maintenance, but skipping simple routine tasks can drastically reduce performance and shorten service life. The 2022 Texas A&M AgriLife venturi user survey identified the leading causes of reduced performance as: clogged suction filters (47% of reported issues), mineral/fertilizer buildup in the throat (29%), worn/cracked o-rings causing air leaks (14%), and backflow damage from missing check valves (10%).
Season-Long Maintenance Schedule
Follow this simple schedule to keep your injector operating at peak performance for 12+ years:
- Before every fertigation event (2-minute check): Inspect the suction line filter for debris, confirm the suction line is fully submerged in the stock tank, and check inlet/outlet pressure gauges to verify the required 20-30% pressure differential. This simple check prevents 90% of common performance issues.
- Every 4 weeks during the growing season: Flush the suction line with clean water, remove the venturi body and rinse the internal throat to remove fertilizer crystal buildup, and inspect o-rings for cracks or wear. For operations using high-phosphorus fertilizers or irrigating with hard water (greater than 180 ppm calcium carbonate), soak the venturi body in a 10% white vinegar solution for 30 minutes every 8 weeks to dissolve mineral deposits. Left unaddressed, mineral deposits can reduce throat diameter by 15% over a single growing season, cutting suction rates by 35%.
- End of growing season: Remove the venturi from the line, rinse all components thoroughly, drain all trapped water, and store in a cool, dry location out of direct sunlight. A 2023 Iowa State University Extension equipment survey found that freeze damage from trapped water expanding in the constricted throat causes 62% of permanent venturi body failures in temperate climates, as units left installed over winter often crack when temperatures drop below freezing.
Practical Maintenance Example: A 5-acre highbush blueberry farm in southwest Michigan installed two 1-inch polypropylene venturis in 2018 for their drip irrigation system, used to apply acidified ammonium sulfate and sulfur to maintain low soil pH. The farm follows the recommended maintenance schedule: checking filters before each fertigation event, flushing units monthly, soaking in vinegar quarterly to dissolve iron and sulfur deposits, and removing and storing units indoors each winter. As of 2024, the units operate at 98% of their rated suction rate with no replacement parts needed, compared to neighboring blueberry farms that leave venturis installed year-round and replace units every 2-3 years due to freeze damage and mineral buildup, saving the farm an estimated $420 in equipment costs over six years.
Troubleshooting Common Venturi Injector Problems
No Suction (Most Common User Complaint)
A total lack of suction is almost always tied to one of four easily fixed issues, per University of Arizona Cooperative Extension diagnostic data:
- Insufficient pressure differential: If the pressure drop between inlet and outlet is less than 20% of inlet pressure, partially close the outlet throttle valve (inline installs) or main line bypass valve (bypass installs) to increase differential. 58% of no-suction issues are resolved with this simple adjustment.
- Air leak in the suction line: Even a 1/32-inch crack or loose o-ring on the suction line will break the vacuum required for suction. Tighten all connections, replace cracked o-rings, and ensure the suction line is fully submerged in the stock tank.
- Completely clogged venturi throat: Remove the injector body and flush the throat with clean water to dislodge debris pulled through a missing or torn suction filter.
- Flow rate below minimum rated level: If running a small irrigation zone with flow below the injector’s minimum rated GPM, the unit will not create enough vacuum to pull solution, requiring a smaller injector size.
Inconsistent or Low Suction Rate
If suction is present but weaker than calibrated rates, check for the following causes:
- Partial mineral or fertilizer crystal buildup in the injector throat, restricting flow and reducing vacuum strength
- Partially clogged suction filter, reducing flow into the suction line
- Excessive suction lift: Most standard venturis only generate enough vacuum to pull solution from 3-6 feet below the injector; suction drops by 10% for every additional foot of lift below 6 feet.
- Partially closed upstream valve, reducing inlet pressure and flow through the injector
Injection Rate Higher Than Calibrated
If the injector pulls solution faster than the calibrated rate, leading to over-application of fertilizer, check for:
- Worn throttle valve that allows excess flow through the venturi, increasing pressure differential beyond calibrated levels
- Main line leak downstream of the injector, reducing outlet pressure and increasing pressure drop across the unit
- Broken zone valve or blown emitter line, increasing total system flow through the injector
Real-World Use Cases and Measured ROI
Venturi injectors deliver consistent returns across every scale of agricultural operation, from 0.25-acre urban farms to 100+ acre commercial orchards.
0.25-Acre Urban Vegetable Farm
City Roots Farm, a small market farm in Columbus, Ohio, growing mixed vegetables for local farmers markets, installed a ½-inch polypropylene venturi in 2022 for a total cost of $70 (including injector, filter, check valve, and pressure gauges). Prior to installation, farm staff spent 3 hours per week applying granular organic fertilizer by hand, with soil tests showing 28% of applied nitrogen was lost to runoff. In the first growing season:
- Fertilization labor dropped to 5 minutes per week, saving 78 hours per season valued at $1,170 at a $15/hour labor rate
- Nitrogen use efficiency increased from 34% to 69%, cutting annual fertilizer costs from $215 to $94, a 56% savings
- Tomato and cucumber yields increased by 22% from consistent weekly nutrient applications, generating an extra $1,840 in annual farmers market sales
- Total payback period for the injector: 17 days, based on combined labor and input savings.
35-Acre Corn-Soybean Farm with Subsurface Drip Irrigation
A family-owned row crop farm in central Illinois installed a 2-inch stainless steel venturi on a bypass loop in 2021 for a total cost of $385, to fertigate corn through their subsurface drip irrigation (SDI) system. Prior to installation, the farm applied dry broadcast fertilizer via tractor spreader, with 31% nitrogen use efficiency and 12 hours of tractor time per fertilization event. After three growing seasons:
- Nitrogen use efficiency increased to 67%, reducing annual nitrogen application rates from 180 lbs/acre to 112 lbs/acre, saving $46 per acre ($1,610 total per year) in fertilizer costs
- Tractor time for fertilization was eliminated, saving 36 hours of labor and $520 in annual fuel and equipment maintenance costs
- Average corn yields increased by 19 bushels per acre, generating an extra $14,364 in annual gross revenue at 2023 corn prices of $4.30/bushel
- Soil nitrate leaching was reduced by 49%, helping the farm meet Illinois state nutrient loss reduction requirements and qualify for $1,200 per year in USDA conservation cost-share funds.
22-Acre Commercial Apple Orchard
A Honeycrisp apple orchard in western Michigan installed two 1.5-inch glass-filled nylon venturis in a parallel manifold in 2020 for a total cost of $540, to apply calcium and nitrogen through their micro-sprinkler system. Prior to installation, the orchard applied calcium via foliar spray six times per growing season to prevent bitter pit, which caused 11% of fruit to be culled at harvest. After four seasons:
- Root-zone calcium applications via the venturi reduced bitter pit cull rates from 11% to 2.8%, adding $21,400 in annual revenue from higher fruit packout rates
- Foliar spray applications were reduced from six to one per season, saving $3,200 per year in spray materials and aerial application costs
- Annual maintenance costs for the venturi system averaged $18 per year (filter replacements, o-ring checks), compared to $270 per year previously spent maintaining failure-prone piston injectors
- Michigan State University Extension financial analysis calculated a 10-year net return on the venturi investment of $243,220 for the orchard.
Common Mistakes to Avoid for First-Time Users
- Skipping pressure gauges: A 2023 Irrigation Association new user survey found that 63% of first-time venturi buyers skip installing inlet and outlet pressure gauges, leading to guesswork on pressure differential and 40% higher rates of performance issues. Liquid-filled pressure gauges cost $8-$12 each, and eliminate 90% of calibration and troubleshooting guesswork.
- Oversizing injectors for low-flow systems: Installing a 1-inch venturi on a 3 GPM residential drip system will result in zero suction, as 1-inch units require a minimum 5 GPM flow to create vacuum. Always match injector size to your smallest zone flow rate, not your maximum system flow.
- Omitting the suction line filter: As noted earlier, 47% of performance issues are tied to clogged filters; a missing filter can allow debris to lodge in the venturi throat or clog drip emitters, leading to hundreds of dollars in emitter replacement costs.
- Placing stock tanks too low: Standard venturis have a maximum suction lift of 6 feet; placing the stock tank 8 feet below the injector will reduce suction by 30% or more, leading to consistent under-application of nutrients.
- Applying undissolved granular fertilizer: Granular fertilizers that are not fully dissolved will leave sediment that clogs the injector throat and emitters; always use fully dissolved water-soluble fertilizers or liquid concentrates, even with a suction filter in place.
Frequently Asked Questions
Can I use a venturi injector with a gravity-fed irrigation system?
Yes, but you will need a low-pressure venturi model rated for 5-15 PSI operation. Standard venturis require a minimum 15 PSI inlet pressure, equivalent to 34.6 feet of vertical elevation head (water generates 0.433 PSI of pressure per foot of elevation drop), so standard models will not work on gravity systems with less than 35 feet of drop between the water source and field. Low-pressure models operate at 5 PSI (11.5 feet of head), making them suitable for rain barrel, hillside spring, and elevated tank gravity systems. 2023 University of Kentucky testing found that low-pressure venturis achieve 0.5-2% injection rates at 8 PSI inlet, with ±5% accuracy, making them ideal for off-grid operations.
How do I prevent fertilizer burn when using a venturi injector?
Crop burn occurs when applied fertilizer concentration exceeds 3-5% for most field crops, or when injection rates are miscalibrated. To prevent burn, always calibrate the injector before each fertilizer application,