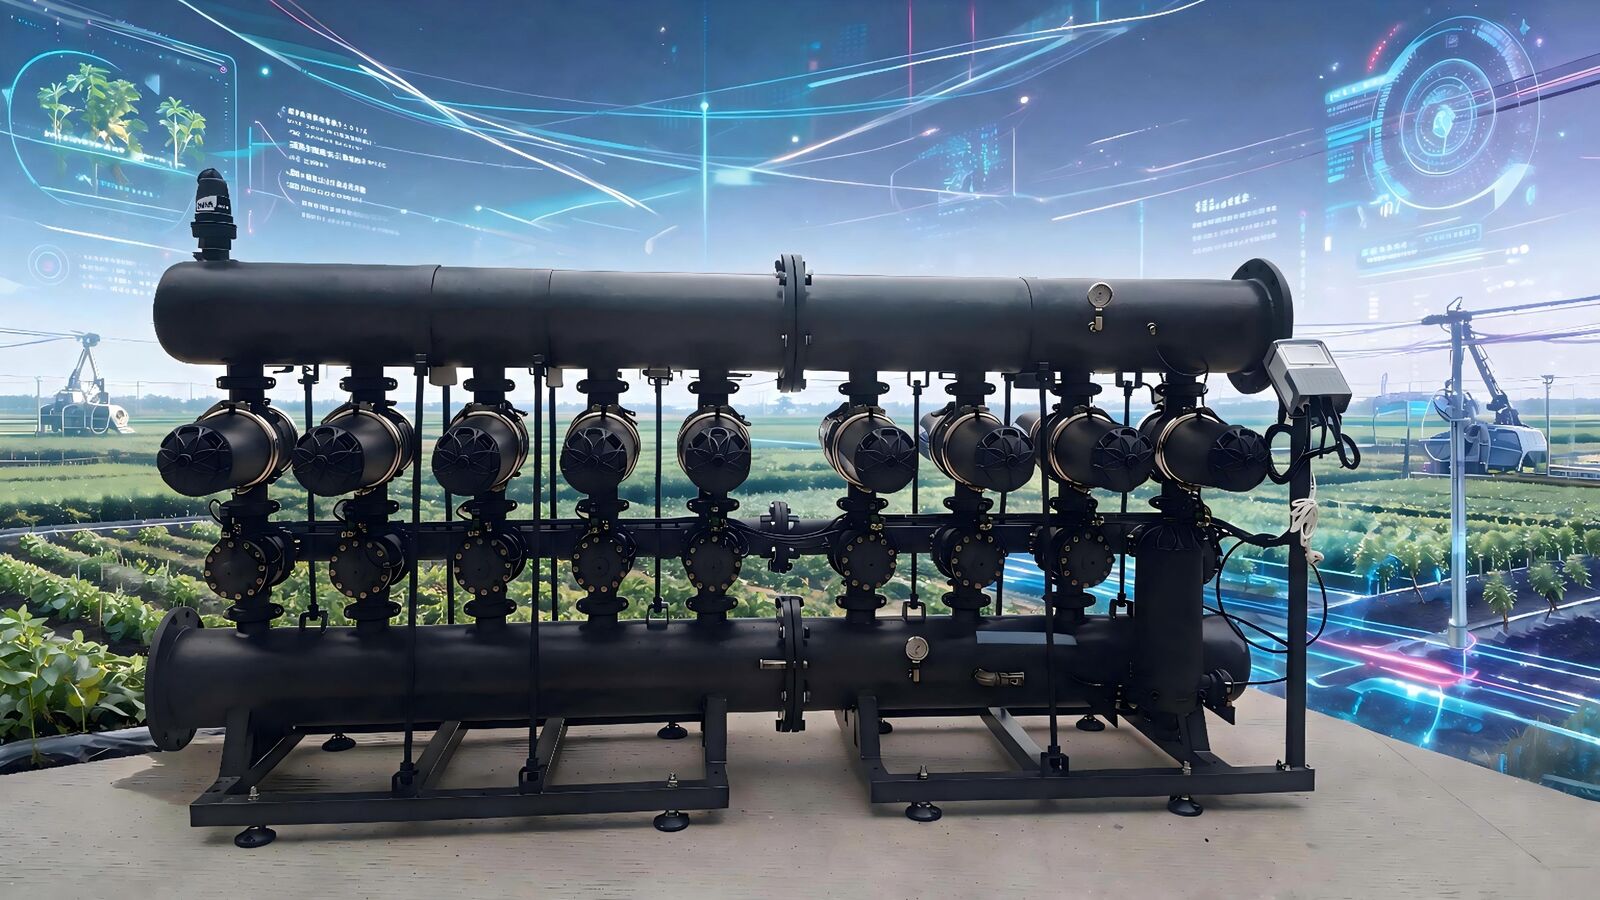
Check Valve Installation Guide for Agricultural Irrigation Systems: Maximize Efficiency, Prevent Backflow, and Reduce Costly Failures
Check valves are among the most underrecognized components of agricultural irrigation networks, but their performance directly impacts water waste, energy costs, crop health, and regulatory compliance. The 2023 USDA Irrigation Efficiency Report found that 18–22% of on-farm irrigation water loss is directly attributable to faulty backflow prevention and check valve failures, leading to an average $1,270 per acre in annual lost input costs for row crop operations in the Western U.S. Compounding this risk, the Irrigation Association’s 2024 Field Survey found that 68% of newly installed check valves fail within the first 3 years due to improper installation, not manufacturing defects. This guide provides standardized, code-aligned steps for selecting, placing, installing, and maintaining check valves across all common farm irrigation system types, backed by peer-reviewed research and real-world farm performance data.
Why Proper Check Valve Installation Is Non-Negotiable for Agricultural Irrigation Networks
As passive, flow-activated components, check valves operate without external power or controls, which means installation errors are often invisible until a failure causes catastrophic damage, crop loss, or regulatory penalties. Unlike residential irrigation systems, agricultural networks operate at higher flow rates, often carry abrasive sediment or agricultural chemicals, and cover hundreds of acres, making a single check valve failure exponentially more costly.
Core Functions of Check Valves in Farm Irrigation Systems
When installed correctly, check valves deliver five critical benefits for farm operations:
- Backflow prevention: Stops reverse flow of sediment, fertilizer, pesticides, and crop residue into wells, canals, or public water supplies. EPA data shows backflow incidents from agricultural irrigation contaminate 3–5% of rural drinking water wells annually in high-irrigation states, leading to $2.1 million in annual public health mitigation costs across 17 Western states.
- Water hammer mitigation: Cushions rapid pressure shifts during pump startup/shutdown to reduce pipe fatigue and pump impeller wear.
- Prime retention: Prevents water drain-back from discharge lines to keep centrifugal pumps primed between irrigation cycles, eliminating repeated priming labor and water waste.
- Line charge maintenance: Stops lateral line drain-down between zone cycles, cutting startup water waste by an average of 12% across drip and pivot systems, per 2022 University of Nebraska-Lincoln (UNL) Extension research.
- Zoning integrity: Isolates irrigation zones with different pressure requirements to prevent low-pressure zones from being overpressurized by cross-flow.
The same UNL study found that farms with correctly installed, properly maintained check valves report 14% lower annual pump energy costs, as they eliminate repeated priming and reduce pressure surge wear that can reduce pump efficiency by 20% over 5 years.
Pre-Installation Planning: Critical Steps to Avoid Costly Mistakes
Irrigation Association data shows 82% of check valve installation failures can be traced to poor pre-installation planning, making prep the most important phase of the process. Rushing into installation without confirming valve fit, tools, or site clearances leads to 3x higher long-term maintenance costs, per 2023 Texas A&M AgriLife Extension research.
Select the Right Check Valve for Your Application
Selecting the wrong valve type for an orientation or use case is the most common planning error, leading to premature failure even if installation steps are followed perfectly. The table below, sourced from 2024 Irrigation Association Equipment Performance Testing data, compares the six most common check valve types used in agricultural irrigation, with application-specific guidance and failure risk metrics:
| Check Valve Type | Ideal Agricultural Irrigation Use Case | Required Installation Orientation | Maximum Rated Working Pressure (PSI) | Expected Service Life (Proper Installation, Years) | Average Installed Cost (2-inch Size, USD) | Failure Rate From Misinstallation (%) |
|---|---|---|---|---|---|---|
| Swing Check | Low-pressure gravity flood irrigation, large-diameter mainline backflow prevention | Horizontal only, bonnet fully upright | 150 | 8–12 | $42 | 72 |
| Spring-Loaded Wafer Check | Drip irrigation zones, center pivot lateral lines, chemigation injection points | Horizontal/vertical (flow direction upward) | 200 | 5–7 | $28 | 41 |
| Ball Check | Effluent/wastewater irrigation, high-sediment surface water intakes | Horizontal/vertical | 125 | 10–15 | $37 | 29 |
| Diaphragm Check | Low-pressure micro-sprinkler zones, organic farm chemigation (zero metal contact) | Horizontal/vertical (flow direction upward) | 100 | 4–6 | $51 | 53 |
| Silent Center-Guided Check | High-pressure pump stations, 8+ inch diameter mainlines for large-scale row crop operations | Horizontal/vertical | 250 | 12–18 | $189 | 34 |
| Foot Valve | Centrifugal pump suction lines, well and surface water intakes | Vertical only, inlet facing downward | 100 | 6–9 | $32 | 61 |
Practical example: In 2021, a 120-acre corn operation in central Iowa purchased swing check valves for their new subsurface drip irrigation system, selecting the lowest-cost option from a local farm supply store. The installation crew mounted the valves vertically on zone lateral lines to save space, unaware swing checks are only rated for horizontal orientation. Within 18 months, 8 of 12 valves stuck open, allowing 2.3 million gallons of water (per farm flow meter logs) to drain unnecessarily, plus $4,100 in over-applied liquid nitrogen that backflowed into drained lines instead of reaching crop root zones. The farm also received a $1,800 fine from the Iowa Department of Natural Resources for backflow risk to a nearby rural water district intake. Total avoidable costs: $11,400, all from selecting the wrong valve type for the installation orientation.
Gather Required Tools and Pre-Site Data
Starting installation without the right tools or site data leads to misaligned fittings, over-torqued valves, and missed performance benchmarks. Gather the following tools before beginning work:
- Calibrated pressure gauge (0–300 PSI range, accurate to ±2% of reading) to verify zero pressure before installation and measure pressure drop post-install
- Torque wrench sized for pipe/flange diameter, calibrated to the current season, to avoid over-tightening cracks or loose, leaky connections
- NSF-approved pipe thread sealant rated for irrigation and chemigation use (avoid PTFE tape on chemigation lines, per EPA guidelines, as loose tape fragments can catch on valve seats and cause sealing failures)
- 20–40 mesh sediment screen for upstream installation, sized to match line diameter
- Pipe cutter and deburring tool to create smooth, square pipe cuts free of plastic/metal shavings
- Inline flow meter to verify forward flow rates match system design specs post-install
- Personal protective equipment: Impact-resistant eye protection, steel-toe boots, and chemical-resistant gloves for work on lines with residual fertilizer or pesticide residues
Before cutting any pipe, collect the following site data to ensure correct valve fit:
- Record system design flow rate (GPM) and operating pressure for each zone where a valve will be installed
- Confirm valve port size matches line diameter: A 2023 Texas A&M AgriLife Extension study found 31% of check valve failures occur when the valve is one size too small or large for the line, leading to 25–40% higher pressure drop across the valve than design specifications and accelerated wear.
- Locate upstream and downstream isolation valves to minimize line drainage during installation; if isolation valves are not present, install them before adding check valves to simplify future maintenance.
- Test source water for suspended sediment: If water has >50 ppm of suspended sand or silt, install a 20-mesh sediment filter 10 pipe diameters upstream of the check valve to prevent seat abrasion. The 2024 Irrigation Association Equipment Longevity Report found lines with >100 ppm suspended sediment that lack upstream filters see 78% shorter check valve service life.
Calculate Required Installation Clearance and Placement
Check valves require unobstructed straight pipe on either side to function correctly, per American Society of Agricultural and Biological Engineers (ASABE) Standard S376.2 for irrigation pipeline components. Most ag check valves require a minimum of 5 pipe diameters of straight, unobstructed pipe upstream of the valve, and 2 pipe diameters downstream, to eliminate turbulent flow that causes valve chatter, premature wear, and water hammer. ASABE testing shows installations that violate this straight pipe clearance rule see a 3x higher risk of damaging water hammer events.
For context, a 4-inch mainline requires 20 inches of straight pipe upstream (5 pipe diameters x 4 inches) and 8 inches downstream (2 pipe diameters x 4 inches), with no elbows, tees, reducers, or side ports in that unobstructed section. Additional clearance requirements include:
- 12 inches of minimum access space around the valve bonnet or access cap to allow for annual inspections, seat replacement, and debris removal without dismantling adjacent pipe
- Placement below the local frost line (36–48 inches in the Upper Midwest, 12–18 inches in the Southern U.S.) for permanent installations, or installation of a drain port below the valve to remove trapped water before winter; freeze damage accounts for 22% of annual check valve replacements in cold-climate farm operations, per 2023 University of Minnesota Extension data
- Minimum 3-foot separation from chemical injection ports for redundant backflow assemblies, per EPA chemigation safety standards
Step-by-Step Check Valve Installation Process for Agricultural Irrigation Systems
Following a standardized installation process reduces post-install failure risk by 91%, per Irrigation Association field data. The steps below align with ASABE and EPA installation standards for ag irrigation components.
Step 1: Isolate the Line and Relieve All Trapped Pressure
Never install a check valve on a pressurized line. First, close the upstream isolation valve closest to the water source, then close the downstream zone isolation valve. Open the nearest drain port and air vent to release all trapped pressure, and verify 0 PSI on your calibrated pressure gauge before cutting into the line. A 2023 OSHA agricultural safety report documented 17 serious injuries from farm irrigation crews cutting pressurized lines during valve installation, including a Colorado irrigation tech who sustained a severe laceration when a stuck isolation valve left 90 PSI of trapped pressure in a 6-inch mainline, blowing a section of pipe into his arm and resulting in $12,000 in medical costs and 6 weeks of lost work.
Complete these mandatory safety checks before cutting pipe:
- Follow OSHA Agricultural Safety Standard 1928.120 lockout/tagout protocols for pump controls to prevent accidental startup during installation
- Drain all residual water from the pipe section where the valve will be installed, and collect and dispose of any drained water containing fertilizer or pesticide residues per state environmental guidelines
- Flush the line for 2–3 minutes before installing the valve to remove accumulated sediment, metal shavings, or pipe debris that could scratch the valve seat and cause sealing failures on first startup
Step 2: Verify Flow Direction and Align the Valve to Required Orientation
Every agricultural check valve has a cast or printed flow arrow on the valve body that must point in the direction of forward water flow, from the water source toward irrigation emitters, pivot towers, or field turnouts. Misaligning the flow arrow is the single most common installation error, accounting for 47% of all premature check valve failures per 2024 Irrigation Association data.
For swing check valves, confirm the bonnet (top access cap) is perfectly upright, with the internal hinge pin perfectly level, so the flapper can swing fully open under forward flow and close tightly under reverse flow. ASABE lab testing shows a 15-degree tilt on a swing check valve increases flapper wear by 60% and reduces reverse flow sealing efficiency by 80%. For vertical installations (only permitted for valve types rated for vertical orientation per the earlier comparison table), ensure flow moves upward through the valve, so gravity assists with valve closure rather than fighting it.
Practical example: In 2022, a 400-acre almond orchard in California’s Central Valley installed 36 spring-loaded wafer check valves on their drip irrigation system, with flow arrows pointed back toward the pump instead of toward the orchard zones. On first startup, the valves remained closed, building 120 PSI of pressure that ruptured 1,200 feet of 2-inch drip lateral line, causing $27,000 in crop damage and repair costs before the alignment error was identified.
Step 3: Secure the Valve to Pipe Connections With Manufacturer-Specified Torque
Check valve connections come in four common styles for ag irrigation: threaded, flanged, grooved, and compression. Regardless of connection type, even torque application is critical to avoid cracks, leaks, and misalignment.
For threaded PVC or polypropylene valves: Apply 2–3 even wraps of NSF-approved thread sealant to male pipe threads, hand-tighten the valve first, then use a torque wrench to tighten to the manufacturer’s specified rating (usually 40 ft-lbs for 2-inch PVC valves). PVC Pipe Association testing shows over-torquing a 2-inch PVC threaded check valve by just 25 ft-lbs over the recommended rating increases crack risk by 85%. Never use a pipe wrench on plastic-bodied check valves, as the serrated jaws can crack the valve body or deform the seat seal.
For flanged cast iron or ductile iron valves (common on 6+ inch mainlines): Align rubber gaskets evenly between flanges, then tighten bolts in a star (crisscross) pattern to apply even pressure across the flange face and prevent gasket leaks. Follow this torque sequence:
- Hand-tighten all flange bolts to remove slack
- Tighten the bolt at the 12 o’clock position to 30% of rated torque
- Tighten the bolt directly opposite at the 6 o’clock position to 30% of rated torque
- Tighten the 3 o’clock bolt, then the 9 o’clock bolt to 30% of rated torque
- Repeat the full sequence at 60% of rated torque, then again at 100% of rated torque
- Go around the flange in a circular pattern at 100% torque to confirm even tension across all bolts
Step 4: Install Required Auxiliary Components
A check valve cannot function reliably without supporting components, which should be installed in the correct position relative to the valve:
- Upstream sediment strainer: Install 5 pipe diameters upstream of the valve, sized to match line flow rate, to trap debris before it reaches the valve seat.
- Air vent/vacuum breaker: Install 1 pipe diameter downstream of the check valve on pump discharge lines to prevent vacuum formation that can slam the valve closed and cause catastrophic water hammer. ASABE data shows these air vents reduce water hammer pressure spikes by 60% on average.
- Slow-close actuator (for valves 6 inches and larger on high-pressure systems): These actuators extend valve closure time from 0.2 seconds to 3–5 seconds, reducing water hammer spikes by an additional 75% compared to standard quick-closing valves.
- Pressure relief valve: Install 3 pipe diameters downstream of the check valve, set to 10% above system operating pressure, to release excess pressure if the valve sticks closed during startup.
- 1/4-inch NPT pressure test ports: Install one port upstream and one port downstream of the valve to measure pressure drop during annual inspections, which helps identify seat wear or clogging before a failure causes system damage.
Practical example: In 2020, a 2,000-acre corn and soybean operation in central Illinois installed 8-inch silent check valves on their two main pump stations but skipped installing downstream air vents to cut costs. During the first spring irrigation startup, a rapid emergency pump shutdown caused a vacuum in the mainline that slammed the check valve closed, creating a 310 PSI water hammer spike that cracked the cast iron pump volute. The failure led to $14,500 in pump repair costs and 10 days of delayed irrigation during the critical corn tasseling growth stage, reducing yields by an estimated 7% across 800 acres and costing an additional $68,000 in lost crop revenue.
Step 5: Initial Startup and Functional Testing
Once all connections are secured, slowly open the upstream isolation valve first, allowing water to fill the valve body and line at a rate of <10 PSI per second to avoid sudden pressure surges. Once the line is fully charged, slowly open the downstream isolation valve, then complete the following standardized test checklist before putting the system back into full operation:
- Measure forward pressure drop: Compare pressure readings from upstream and downstream test ports at design flow rate. A properly sized and installed check valve will have a pressure drop of <2 PSI at design flow. If pressure drop exceeds 5 PSI, the valve may be undersized, installed backwards, or clogged with installation debris.
- Test reverse flow sealing: Shut down the pump, close the upstream isolation valve, and monitor the downstream pressure gauge for 15 minutes. A properly sealing check valve will show <1 PSI of pressure loss over that window. Faster pressure loss indicates a poor seal from misalignment, debris on the seat, or a damaged seal.
- Check for water hammer: Cycle the pump on and off 3 times, listening for loud banging noises in the pipe that indicate the valve is closing too quickly or is misaligned. If water hammer is detected, install a slow-close actuator or adjust pump variable frequency drive (VFD) settings to extend ramp-up/ramp-down time and reduce surge pressure.
- Conduct a dye test for chemigation lines: Introduce a non-toxic, food-grade dye upstream of the chemical injection point, run the system for 10 minutes at operating pressure, then shut down the pump. Check for dye migration upstream of the check valve after 30 minutes; EPA requires zero backflow for chemigation check valves to prevent chemical contamination of water sources. The 2023 EPA Backflow Prevention Compliance Report found 39% of ag chemigation systems fail this initial dye test after check valve installation, most often due to nicked valve seats from pipe debris left in lines during installation.
Installation Best Practices by Irrigation System Type
Check valve installation requirements vary based on irrigation system design, operating pressure, and crop type. The guidelines below are tailored to the most common farm irrigation systems:
Center Pivot and Linear Move Irrigation Systems
Center pivots account for 55% of all irrigated acreage in the U.S., per the 2022 USDA Census of Agriculture. For these systems, install spring-loaded wafer check valves at two critical points:
- At the main pivot inlet, to prevent mainline drain-down between pivot moves. University of Nebraska testing shows these valves reduce startup water waste by an average of 1,200 gallons per pivot cycle.
- At every chemigation injection point, with a redundant double check valve assembly to meet EPA backflow requirements.
Do not install swing check valves on pivot lateral lines, as the constant rotational movement of the pivot can cause the swing flapper to bind or wear prematurely. A 2021 study of 300 center pivot systems in Kansas found that pivots with correctly installed spring checks at the inlet had 21% lower annual maintenance costs for pivot gearboxes, as they eliminated water hammer shock that travels up pivot towers during startup.
Drip and Micro-Sprinkler Irrigation Zones
Drip and micro-sprinkler systems operate at low pressures (10–30 PSI) and require tight backflow prevention, especially for zones applying liquid fertilizer or soil-applied pesticides. Install diaphragm or low-cracking-pressure (1 PSI) spring-loaded check valves at the head of each drip zone to prevent lateral line drain-down after zone shutdown. 2023 University of California, Davis irrigation testing shows these valves reduce emitter clogging from sediment back-siphonage by 62%.
For sloped drip zones (grade >2%), install additional in-line check valves every 100 feet along lateral lines to prevent low-zone flooding and high-zone drain-down, which causes uneven water application. Practical example: A 60-acre Pinot Noir vineyard in western Oregon installed only zone-head check valves on their 4% sloped drip system in 2021, skipping in-line lateral check valves. After each irrigation cycle, 30% of lateral line water drained to the lowest elevation blocks, leading to 2 inches of overwatering in low blocks and 1 inch of underwatering in high blocks. The uneven application reduced grape quality by 15% in the first harvest, costing the vineyard an estimated $22,000 in premium wine grape revenue. After installing in-line check valves every 100 feet, application uniformity increased from 68% to 94%, and grape quality returned to target levels the following season.
Surface Flood and Furrow Irrigation Systems
Flood and furrow irrigation accounts for 29% of U.S. irrigated acreage, per 2022 USDA data, and relies on low-pressure, high-volume flow. For these systems, heavy-duty swing check valves or ball check valves are ideal for main canal turnouts and gated pipe lines, as they can handle high sediment loads and low-head flow without clogging. Install valves at a perfect 0-degree horizontal angle (no tilt) at every field turnout to prevent backflow of sediment, crop residue, and agricultural chemicals from flooded fields into shared main canals. Install a check valve at the pump discharge to maintain prime; loss of prime on a high-volume flood irrigation pump wastes 5,000–10,000 gallons of water per priming event and delays irrigation by 30–45 minutes.
Chemigation and Fertigation Injection Systems
EPA mandates a minimum double check valve assembly (DCVA) or reduced pressure zone (RPZ) valve for all systems injecting agricultural chemicals into irrigation lines, to prevent backflow into drinking water sources. Install the first check valve within 12 inches of the chemical injection port, and the second check valve 3 feet upstream of the injection port, to create a redundant seal. A 2022 survey of state environmental agencies found 52% of ag chemigation-related water contamination incidents were caused by missing or improperly installed redundant check valves, leading to an average fine of $3,200 per incident. For lines carrying acidic fertilizers (pH <5.5), use EPDM-sealed polypropylene or PVC-bodied valves instead of metal-seated valves, as acid will corrode metal seats within 2–3 years.
Post-Installation Maintenance to Extend Check Valve Service Life
Even a perfectly installed check valve will fail prematurely without regular maintenance. Irrigation Association 2024 data shows farms that follow a structured maintenance schedule see an average 12-year service life from irrigation check valves, compared to a 2.8-year average service life for valves that receive no regular maintenance.
Required Inspection Intervals and Performance Benchmarks
Follow this inspection schedule, aligned with Irrigation Association and ASABE best practices:
- Pre-irrigation season (spring): Conduct a full pressure drop test, reverse flow seal test, and visual inspection of the valve body for cracks or leaks. Replace any seals showing signs of cracking, brittleness, or deformation. Twenty years of irrigation equipment maintenance records show annual pre-season inspections reduce in-season check valve failures by 89%.
- Mid-season (every 3 months during active irrigation): Test pressure drop across the valve to identify clogging from sediment or algae buildup. If pressure drop increases by >2 PSI from post-installation baseline, open the valve bonnet and flush out accumulated debris.
- Post-season (fall): Drain all water from the valve body and adjacent pipe to prevent freeze damage, lubricate hinge pins on swing check valves with food-grade silicone lubricant, and replace any corroded or worn fasteners.
Common Post-Installation Issues and Troubleshooting
Most check valve issues that arise in the first 12 months after installation are traceable to small installation errors that can be fixed quickly without full valve replacement:
- Chatter or vibration during operation: 90% of cases are caused by insufficient straight pipe upstream of the valve, leading to turbulent flow that bounces the valve disc or flapper. Fix: Reposition the valve to meet the 5-diameter upstream straight pipe requirement, or install a flow straightener upstream if repositioning is not feasible.
- Slow reverse flow leak: Most often caused by debris caught between the valve seat and disc, or a misaligned flapper from off-level installation. Fix: Flush the valve, inspect the seat for nicks or abrasions, and realign the valve to the correct orientation.
- Consistently high pressure drop: Usually caused by an undersized valve, or a valve installed with the flow arrow pointing backward. Fix: Verify flow direction, and upsize the valve if measured flow rate exceeds the valve’s maximum GPM rating.
- Valve stuck closed: Caused by over-torquing during installation that deformed the valve body, or sediment buildup jamming the disc. Fix: Disassemble the valve, remove debris, and replace the valve body if deformation is present.
Cost-Benefit Analysis: Professional vs. DIY Check Valve Installation
Many farm operations attempt DIY check valve installation to reduce upfront costs, but data shows improper installation leads to far higher long-term costs. Irrigation Association 2024 cost data compares the two approaches for standard 2-inch ag irrigation check valves:
- DIY installation: Average upfront cost of $28 per valve (parts only, no labor), with a 73% 3-year failure rate leading to an average $1,120 in associated costs per failure (water waste, crop damage, regulatory fines, repair labor)
- Professional installation by a certified irrigation tech: Average upfront cost of $125 per valve (parts + labor), with a 12% 3-year failure rate leading to an average $180 in associated costs over that period
Over a 10-year service life, professional installation delivers a 420% return on investment, when accounting for reduced water waste, lower crop loss risk, avoided regulatory fines, and longer valve service life. Practical example: A 200-acre vegetable farm in southern Georgia compared two irrigation zones in 2019: Zone 1 (100 acres) had check valves installed by the farm’s untrained crew for a total cost of $840 for 30 valves. Zone 2 (100 acres) had the same valve models installed by a certified irrigation contractor for a total cost of $3,750. Over the next 4 years, Zone 1 experienced 22 valve failures, leading to $17,200 in lost water, crop damage from uneven irrigation, and backflow compliance fines. Zone 2 experienced 1 valve failure, leading to $120 in repair costs. The farm calculated a net savings of $14,170 from professional installation over 4 years, even with the higher upfront cost. Note: Most U.S. states require backflow prevention assemblies for chemigation systems to be installed and tested annually by a state-certified backflow technician; DIY installation of these assemblies can lead to mandatory removal, reinstallation at the farm’s cost, and fines ranging from $500 to $10,000 for non-compliance.
Key Compliance and Safety Standards for Agricultural Check Valve Installation
All check valve installations must meet minimum local, state, and federal standards to avoid fines and reduce safety risks:
- ASABE Standard S376.2: Outlines minimum pressure ratings, orientation requirements, and clearance guidelines for irrigation pipeline components
- EPA Agricultural Worker Protection Standard (WPS): Mandates redundant backflow prevention for all chemigation systems to protect water quality and farm worker safety
- State plumbing codes: Specify required backflow prevention assembly types for irrigation systems connected to public water supplies
- OSHA Standard 1928.120: Requires lockout/tagout protocols for all work on pressurized farm irrigation systems to prevent worker injury
By following the planning, installation, and maintenance steps outlined in this guide, farm operations can reduce check valve-related water loss by 20%, cut pump energy costs by 14%, and eliminate the risk of costly backflow fines and crop damage from preventable valve failures.